Watch it in 3D
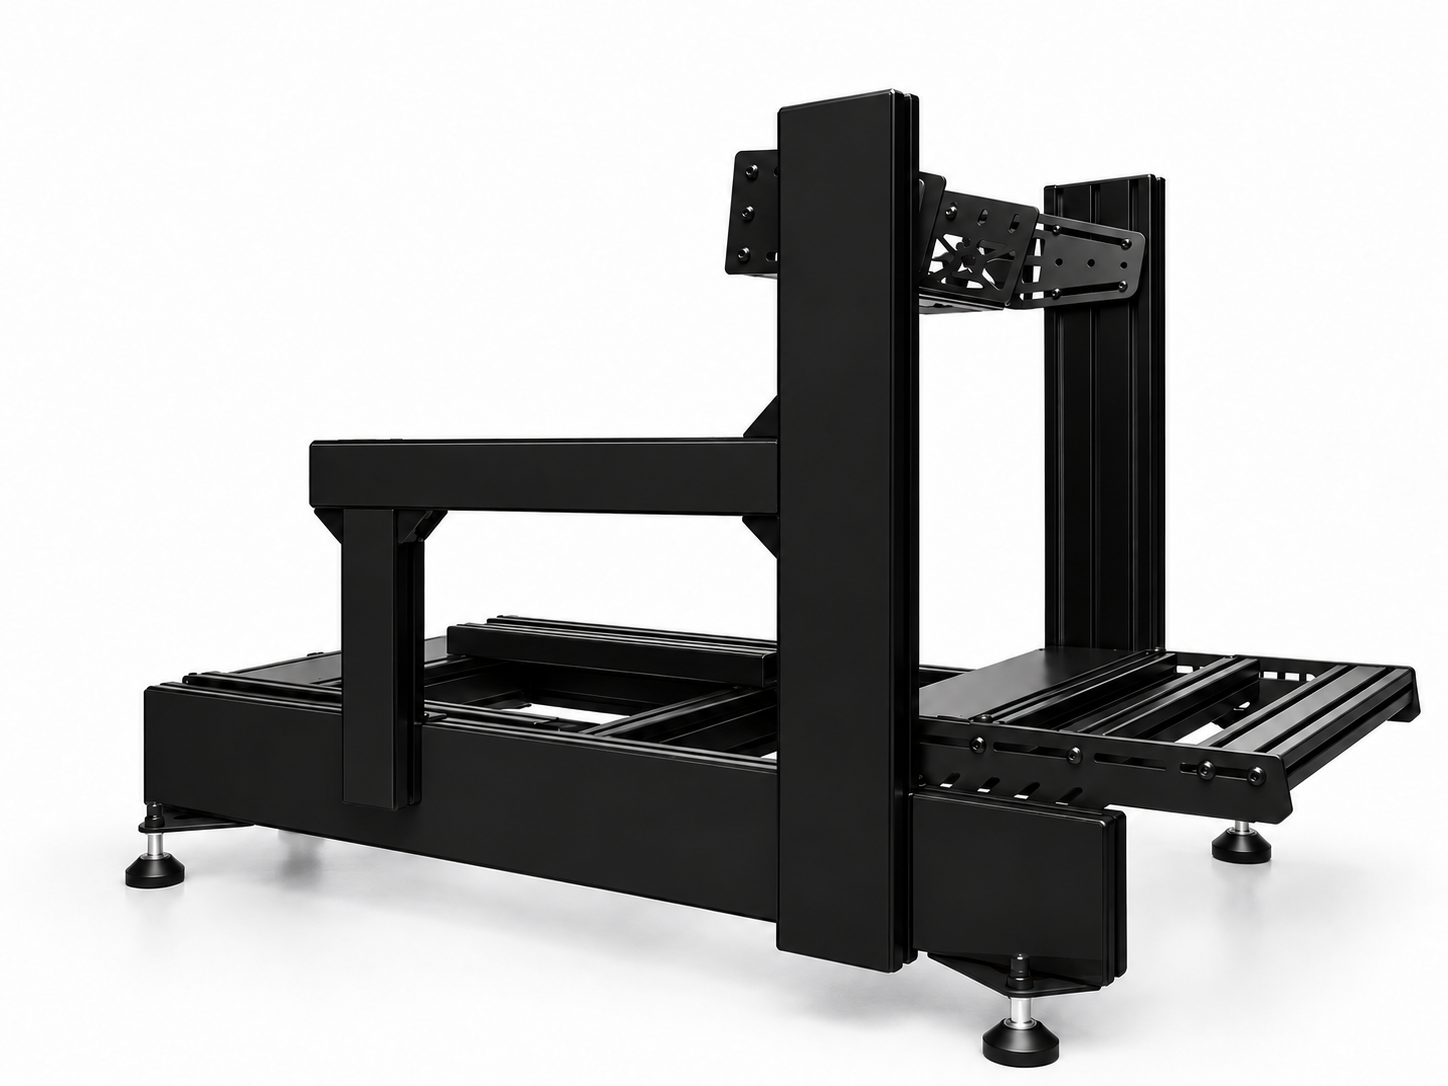
SimXPro GT-RS
Nine short steps from box to finished rig, including your pedals and wheelbase. Every step shows exactly which parts, bolts and T-nuts you pick up.
SimXPro GT-RS Sim Racing Cockpit
$509.49 $645.25
View the cockpit
In the box
2× Base profile 950 mm 2×
Upright 540 mm 1×
Seat profile 420 mm 1×
Accessory profile 340 mm 2×
Pedal profile 410 mm 1×
Pedal profile 410 mm 1×
Backplate 2×
Crossbracket 1×
Frontwing 1×
Wheel plate 2×
Pedal side plate 4×
Red corner bracket 12×
Black corner bracket
M8 bolts
T-nuts
End caps and felt pads
Spare bolts and T-nuts to mount a seat, pedals or accessories
Your setup
Left and right as seen from the seat. Change these at any step.
Accessory profile
Left upright
Right upright
Pedal deck · low position
Flat
Tilted
Pedals
Pedal set with baseplate
Bottom-mounted pedals
Loose pedals
Step 1
of 9
Base frame
The two base profiles are the foundation. Tapped ends to the rear, closed off by the backplate.
What you need
2× Base profile 950 mm 1×
Backplate 4×
M8×16 bolt 2×
Felt pad · optional
Actions
Tap an action with a bold number to replay it in 3D.
1
Lay the two base profiles parallel. 2
Turn the tapped ends to the rear. 3
Place the backplate against the tapped ends. 4
Turn the four bolts into the tapped ends with the hex key, one by one. 5
Align the base frame and stick on the felt pads if you want.
Step 2
of 9
Uprights and red corner brackets
Both uprights stand on the base profiles, each held by two red corner brackets: one in front, one behind.
What you need
2×
Upright 540 mm 4×
Red corner bracket 8×
M8×16 bolt 8×
T-nut
Actions
1
Place the four red corner brackets, two per base profile. 2
Stand the uprights on the base profiles, between their brackets. 3
Set both uprights at the same position. 4
Per bolt, slide a T-nut into the groove, then turn the bolt in with the hex key. Hand-tight for now.
Start with the uprights about 15 cm from the front. You can fine-tune this later.
Step 3
of 9
Crossbrackets
One crossbracket on the outside of each joint between base profile and upright.
What you need
2×
Crossbracket 12×
M8×16 bolt 12×
T-nut
Actions
1
Hold the left crossbracket against the outside of the joint. 2
Six bolts, one per hole. Per bolt: slide a T-nut into the groove, then turn the bolt in with the hex key. 3
Repeat mirrored on the right. 4
Keep the uprights aligned and adjustable.
Step 4
of 9
Frontwing
The frontwing bolts across the front of both uprights, just below the wheel plate.
What you need
1×
Frontwing 4×
M8×12 bolt 4×
T-nut
Actions
1
Hold the frontwing against the front of both uprights. 2
Four short bolts, two per side. Per bolt: slide a T-nut down the front groove, then turn the bolt in with the hex key. 3
Keep the height adjustable for the wheel plate.
Step 5
of 9
Seat and accessory profiles
The seat profile goes between the base profiles. The accessory profile goes on the upright of your choice, pointing towards you.
What you need
1×
Seat profile 420 mm 1×
Accessory profile 340 mm 4×
Black corner bracket 8×
M8×16 bolt 8×
T-nut
Accessory side
Left upright
Right upright
Actions
1
Stand the seat profile upright between the base profiles, about 25 cm from the rear. 2
One black corner bracket per side. Per bolt: a T-nut into the groove, then turn the bolt in with the hex key. The ends of the seat profile are closed by the base profiles, so its T-nuts go in from the front: tilted on their side, a quarter turn over their length until they click, then slide them under the hole. 3
Fit the accessory profile to the left or right upright with two black corner brackets, the same way. 4
Set the accessory height.
Where the seat profile ends up depends on your seat. You can slide it later.
Step 6
of 9
Pedal deck
Two mirrored side plates stand on the floor. The three pedal profiles sit between them, flush with the top edge.
What you need
2×
Pedal side plate 2×
Pedal profile 410 mm 1×
Pedal profile 410 mm 18×
M8×16 bolt 10×
T-nut
Pedal angle
Flat
Tilted
Your pedals
Pedal set with baseplate
Bottom-mounted pedals
Loose pedals
You mount them in step 8. Your choice shows on the deck from there on.
Actions
1
Mount the left side plate with five bolts. Per bolt: slide a T-nut into the groove, then turn the bolt in with the hex key. 2
Mount the right side plate the same way, at the same height and angle. 3
Place both 40×40 pedal profiles between the side plates. 4
Turn one bolt through the side slot into each tapped end. No T-nuts here. 5
Fit the 40×80 pedal profile, two bolts per end. 6
Leave the spacing for now. In step 8 you move the profiles to fit your pedals.
You mount your pedals in step 8. The bolts for them depend on your pedal brand and model.
Step 7
of 9
Wheel plate
The wheel plate sits between the uprights. Its folded sides bolt to the inside of the uprights, the front hangs over the frontwing.
What you need
1×
Wheel plate 4×
M8×16 bolt 4×
T-nut
Actions
1
Place the wheel plate between the uprights, folded sides against the inside. 2
Four bolts through the slots, two per side. Per bolt: slide a T-nut down the inner groove, then turn the bolt in with the hex key. 3
Set the height and check that left and right are level.
The bolts for your wheelbase depend on the wheelbase and are not included. Step 8 shows one in place, with the angle range.
Step 8
of 9
Pedals and wheelbase
Three ways to fix your pedals to the pedal deck. Pick the one that matches your pedal set. Then set your wheelbase on the wheel plate and find your angle.
Your pedals
Pedal set with baseplate
Bottom-mounted pedals
Loose pedals
M8 T-nuts in the front 40×40 and the front groove of the 40×80, M8×16 down through the outer corners of the baseplate, clear of the pedals. The middle 40×40 supports the plate; the rear groove of the 40×80 stays free.
For pedal sets you bolt into from below (Thrustmaster T-LCM shown, at its real size). The front 40×40 stays fully forward, the 40×80 supports the middle and the rear 40×40 sits under the back of the pedal set. Four 40×40 corner brackets on the outside of both 40×40 profiles, guide noses clipped off, give a flat tab under each of the 4 outer holes: bolt up from below with a washer.
Per pedal 4 × M6×12 through the 4 corner holes into M6 T-nuts: front holes in the front 40×40, rear holes in the front groove of the 40×80. The 60 mm of the 40×80 behind them and the rear 40×40 pushed against it form your heel rest.
What you need
1×
Pedal set with baseplate
Your pedals, not included 4×
M8×16 bolt 4×
M8 T-nut 1×
Bottom-mounted pedals
Your pedals, not included 4×
Corner bracket 40×40
Not included with the cockpit 4×
M8×16 bolt 4×
M8 T-nut 4×
Bolt from below
To suit your pedal set 4×
Washer
Tool
Flat screwdriver 2×
Loose pedals
Your pedals, not included 8×
M6 T-nut 8×
M6×12 bolt 1×
Wheelbase
Your wheelbase, not included 4×
M6×12 bolt
For the wheelbase, not included
Actions
Tap an action with a bold number to replay it in 3D.
1
Check your bolts and T-nuts: thread (M8, M6 or sometimes M5) and length must match your pedal set. 2
Loosen the profile end bolts and push the front 40×40 to the front of its slots. Slide the middle 40×40 about 10 cm forward, then the 40×80 about 4 cm forward, until its front groove sits under the rear corners of the baseplate. Its rear groove stays free. Tighten again. 3
Put two M8 T-nuts in the front 40×40 and two in the front groove of the 40×80, under the outer corners of the baseplate. Per T-nut: tilt it on its side into the top groove, give it a quarter turn over its length until it clicks, then slide it under the corner. 4
Set the pedal set on the deck, the outer corners of the baseplate over the T-nuts. Is the baseplate a little off? Nudge it until it fits. 5
Turn 4 × M8×16 down through the outer corners of the baseplate into the T-nuts with the hex key, one at a time, clear of the pedals. 6
Set your wheelbase on the wheel plate. 7
Bolt it on from below: M6×12 up through the wheel plate, one at a time. 8
Set your angle: the wheel plate pivots on its rear bolts, its front resting on the frontwing. Tilt it up to about 12° up or down and slide the frontwing along, or move the whole plate a little down or up, never above the top of the uprights. Tighten again.
1
Check your bolts and T-nuts: thread (M8, M6 or sometimes M5) and length must match your pedal set. 2
Loosen the profile end bolts and push the front 40×40 to the front of its slots. Swap the 40×80 and the rear 40×40: the 40×80 goes into the middle, the rear 40×40 to the seat side. Tighten again. 3
Clip off every guide nose with the flat screwdriver, one at a time: the nose on top of the tab and the noses on the upright leg. Eight in total; the noses drop off. 4
Fit the four corner brackets on the outside of the 40×40 profiles, tab on top and flush with the profile top: two on the front of the front 40×40, two on the rear of the rear 40×40. Each tab sits under an outer hole and the rear tabs do not stick out behind the pedal set. The upright leg lies flat against the profile, no nose in the groove. Per bracket: a T-nut into the groove behind the leg, tilted on its side and given a quarter turn over its length until it clicks, then an M8×16 through the upright leg. 5
Set the pedal set on the deck. The middle hole is not used: the 40×80 supports the middle. 6
From below, bolt up through each tab into the pedal set, one at a time. Add a washer whenever the bolt is smaller than M8. 7
Set your wheelbase on the wheel plate. 8
Bolt it on from below: M6×12 up through the wheel plate, one at a time. 9
Set your angle: the wheel plate pivots on its rear bolts, its front resting on the frontwing. Tilt it up to about 12° up or down and slide the frontwing along, or move the whole plate a little down or up, never above the top of the uprights. Tighten again.
1
Check your bolts and T-nuts: thread (M8, M6 or sometimes M5) and length must match your pedal set. 2
Loosen the profile end bolts and push the front 40×40 to the front of its slots. Swap the 40×80 and the rear 40×40: the 40×80 goes into the middle with its front groove under the rear pedal holes, the rear 40×40 right up against it at the seat side. Tighten again. 3
Put 8 × M6 T-nuts in the top grooves: per pedal two in the front 40×40 and two in the front groove of the 40×80. Per T-nut: tilt it on its side into the groove, give it a quarter turn over its length until it clicks, then slide it under the hole. 4
Set the brake and throttle pedal on the deck, their holes over the T-nuts. 5
Bolt each pedal down with 4 × M6×12, one at a time. The back 60 mm of the 40×80 and the rear 40×40 against it form your heel rest. 6
Set your wheelbase on the wheel plate. 7
Bolt it on from below: M6×12 up through the wheel plate, one at a time. 8
Set your angle: the wheel plate pivots on its rear bolts, its front resting on the frontwing. Tilt it up to about 12° up or down and slide the frontwing along, or move the whole plate a little down or up, never above the top of the uprights. Tighten again.
Bolts, threads and types are brand-specific (M8, M6 or sometimes M5, and the length). They often come with your pedals, but check this before you start, and check that you have T-nuts in the matching size: we sell M4 to M8 T-nuts in our webshop. Some sets need longer bolts or corner brackets; there are too many brands and types for us to include every bolt. The pedal deck is flexible: swap the profiles to fit your pedals.
Mounting hardware for your wheelbase is not included either: wheelbases mount in too many different ways. The Fanatec CSL DD with M6×12 from below is shown for illustration only.
Almost racing.
Step 9
of 9
Finish and final check
Check everything, tighten every bolt and finish with the end caps and stickers.
What you need
5×
End cap 40×80 2×
End cap 40×40 2×
Sticker uprights 2×
Sticker base profiles
Actions
1
Check the alignment of the base frame, uprights and pedal side plates. 2
Tighten every bolt with the hex key. 3
Fit the end caps on the open profile ends. 4
Press the Always Ready To Race stickers onto the outside of both uprights. 5
Press the SimXPro GT-RS stickers onto the rear of both base profiles.
Ready to race.
Get your GT-RS




 SimXPro GT-RS Sim Racing Cockpit
$509.49
From
 SimXPro GT - RS Triple monitor mount
$227.18
 Fanatec GT DD Pro Ready2Race Vision GT Bundle 8 Nm
$1,149.30


